
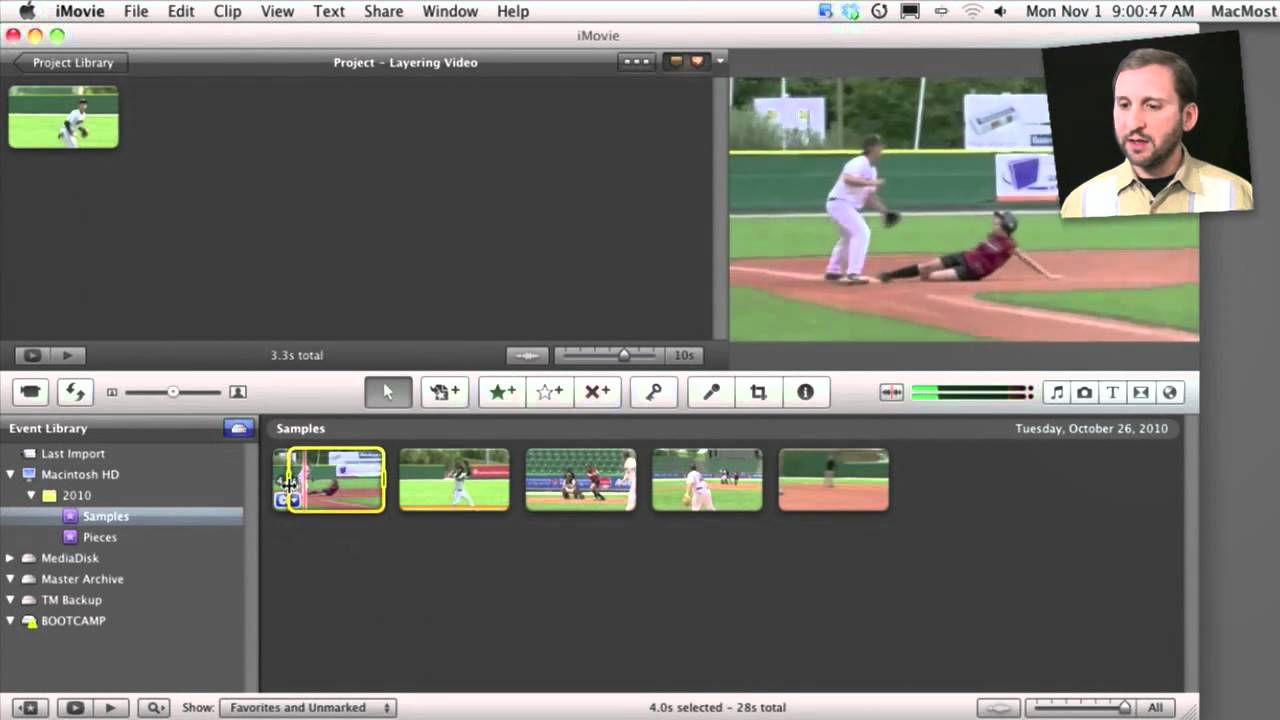
Learn to use three different types of video layering in iMovie 11. You can cutaway to a second video and then cut back, even making the second video semi-transparent. You can include a video as picture-in-picture with borders and a drop shadow. You can also put two videos side-by-side. These features also work with still photos.
▶ You can also watch this video at YouTube.
▶
▶ Watch more videos about related subjects: iMovie (138 videos), Video (65 videos).
▶
▶ Watch more videos about related subjects: iMovie (138 videos), Video (65 videos).


Keep up the good work Gary. Great one again.
Hi Gary,
as usual, "thanks Gary"...and another challenge for you...
do you know if it's possible to display PiP over a slide of text ('slide' being a background with text inserted on it) and also have the video in a small PiP window going at the same time on top of this ?
I know PiP on top of a jpg can be done, though this would require a lot of slides with text saved as jpgs - a nightmare to administer.I'd also rather not put text directly on the video as this can be hard to read sometimes, depending on backgrounds, text size/color etc.
Any ideas ? Do you know if this is do-able in Final Cut ?
Thanks,
Greg.
You can definitely do this in iMovie. Just drag a title to the project space after your last clip. You will be asked to choose a background image -- you can choose black, for instance. Then you can have a title over a plain background. You can set the length of this title-over-a-background to whatever you want. Then you can drag and drop a video over this and choose PiP. Try it.
Hi Gary,
I followed your instructions. I choose a scrolling title but when I playback the slide, the scrolling text starts shaking as soon as the PIP clip comes in and goes back to normal when the PIP clip goes off. Any idea of what could be the cause and how to fix it?
Are you talking about in the final, exported video? Or just inside the iMovie "preview" area. Keep in mind that the preview area is -- a preview. It is trying to render things in real-time. So it takes shortcuts and does the best it can. You won't see the smooth playback you get in the final exported video.
I was talking about the preview area. As you suggested I exported the video and in the exported video the scrolling tile works just perfect. Thank you so much for your help and for the great work you do. It helps me a lot.
how can you do multiple picture in picture without the video degrading?
You can't. Not in iMovie. But if you export at high quality then it isn't so bad.
Hi Gary...I want to place a small logo in the lower left hand side of my video ...to show the entire video...how can I do this? Working with iMovie...thxs.
Sure. Use picture-in-picture.
Hi Gary,
yep it works ! Once again, thanks for the education....this was really annoying me, until I figured out what I'm trying to do....I already have a pic (watermark) as a PiP, stretched the size of the frame. This is why inserting the new video PiP "wouldn't work".....because one already existed. Once I deleted this first watermark PiP, I could add video.....back to the drawing board yet again me thinks....
Thanks !!!
Greg M
P.S: When's your book 'iMovie For The Challenged' being released ? Put me down for the first draft please :-p
My imovie does not show up with the options that showed up in you video when I dragged the second movie clip on top of my first movie clip. Instead, ti comes up with the options, "replace" "Insert" "audio only" and "cancel" What am I doing wrong?
NVM GARY! :) I got it! Lovely video! I'm going to have such an awesome school project!
How did you do this Annie? Or Gary? I have the same issue....Thanks!
Do what, specifically?
When I try to drag the 2nd clip onto the first, only the options 'replace, insert, audio only, and cancel' appear, and not the whole list with the layering options...
Right. Go into iMovie preferences and turn on Advanced Tools (see time 0:12 in the video).
Thanks Gary! Couldn't find the answer anywhere!
Ahh yes yes yes. Thank you so much!!!
Hi Gary, great video. I want to use the side by side function but i want one placed above the other instead of next to each other is this possible?
many thanks
Depends on exactly what you want -- probably not as it doesn't let you control the cropping of each.
Hi Gary,
I needed to blur a face in my video so I did so by saving an image as png and inserting it into iMovie as a picture and picture. However, when I play the movie, the video shows up black. I can hear the audio but I cannot see the subtitles or video itself. What am I doing wrong here? Thanks!
Not sure. Hard to tell without seeing it first-hand.
Yup, it's weird. If I don't include the pip, the video shows up with the subtitles. Perfectly fine. However, when I try including the pip w/ the subtitles, the video is black. Do you have any other recommendations as to how I can blur faces in a video? I have imovie 09.
Have you tried exporting the video? It could just be a limitation of the preview pane.
that worked! you're a life saver. thanks mr. awesome.
hi gary, thanks for this help
is it possible though to blur part of the clip, such as a face or mouth when swearing? or pixelize it?
thanks
See episode 130: http://macmost.com/blurring-an-area-in-imovie-08.html
Hi Gary, is it possible to do 3 videos side by side or can we only do 2?
You can do 2, then export, then import, then add the third. Takes a lot of work so it might be time to upgrade to pro video editing software if you need to do this a lot.
Is the side by side video only for iMovie 11? All I have is iMovie 09, and I'd be disappointed if I had to upgrade.
Right. Side-by-side was added for iMovie 11. But it is a very cheap upgrade.
Hi Gary,
I have had a problem part way through my project in that I was inserting still photos perfectly but then I must have Doberman something wrong or different and now the still photos appear in the project but when I play the project in the viewing pane the new inserted photos now don't appear properly and I see the previous photo or rthe last frame of the previous video!
What am I doing wrong?
Thanks
Brent
How long is your project? How many photos? Did you try exporting -- the preview pane is just a preview, but exporting is the real thing.
hi gary how do you put a keynote presentation into imovie and make it transparent?for example i wanted to make the titles appear instead of dissolving in how can i do it
You can't,at least not easily. No such thing as semi-transparent video in iMovie. I guess you can try playing around with the green screen feature to put yourself in front of a presentation.
ok thanks.
also i don't have the blue screen feature i only have green screen and whats the difference between the different screens and how do i get the blue screen?
Same thing, they just use different colors.
thanks just one last question.instead of having a dissolve in title how do you make it just appear like pop up.thanks for answering my questions have a nice day :)
Select the transition in the project. Bring up the inspector (press I) and then set the fade in/out to 0.
Hi, Gary ...
All I want to do for a family project is put text balloons or basic text or things like arrows or other indicators to highlight something in the video.
How can one do that in Imovie 11?
Not easily. You'd need to make each thought balloon as a 32-bit graphic in Photoshop or something like it. Then overlay it.
HI gary! when i go to select PIP or side by side, every option is there, besides the side by side? HELP!
Perhaps you are using iMovie 09, not 11?
When doing side by side, is there any way to create a border down the middle to separate the two clips?
No, no options like that.
I've seen peopled o it in videos though and they're all using imovie 11 to edit...
I used the tutorial from episode 610 to move scrolling credits to left, with PIP of advertising posters on right. But posters are portrait orientation, and the "fit" puts them in center of frame; moving them to the side makes them small; any way to orient them right / left so they can be larger and still not cover scrolling credits?
What you need to do is to edit the photos before you bring them into iMovie. Use Photoshop, Preview or whatever to get them to fit. So, for instance, you could create a 1280x720 image, but the picture you want is centered on the left side of that image with nothing (transparent) on the right.
Hi,
Thanks for the helpful video. I was wondering how you control the audio when you use PIP or side-by-side? Is there a way to designate which clips audio is the primary or to balance the levels between the two. Right now, it seems that the main clip's audio is the one I hear, and the PIP audio is very quiet and i can't seem to change the levels no matter what changes I make in the inspector.
Any tips would be great. Thanks!
You should be able to set the "ducking" for the PIP so it quiets the main audio. But you have lots of other tools in iMovie to adjust the volume. See episode 468: http://macmost.com/editing-audio-in-imovie-11.html
Hi, Gary. Thanks and how do I rotate the video in "picture in picture"?
You can't. Rotate the original source video (QuickTime Player in Lion can do it easily) and re-save the video before brining it into iMovie.
Hi Gary,
I'm using the picture in picture feature to put a specific logo as the title and it's working, but its cutting off a few letters and the crop won't let me highlight the whole image. When I click fit it works but it leaves the black background and I wanted the letters to float over my video.. What can I do about this? I wan't the whole word image with no black background.
Thank you!
Hard to say but I can guess: Make sure your image is the exact same screen ratio as the video: 16:9 or 4:3. Otherwise, cropping work work very well.
I'm trying to do picture-in-picture, but when I go to drag a clip onto the existing clip, my only options are "Replace", "Insert", "Audio Only", and "Cancel". How do I get the other options that showed up in your video to show in mine?
See 0:12 in the video.
When I try to drag a video or picture onto the video I am simply prompted with replace or insert, and I can't do any of these other features. Why?
Take another look at the video, particularly at 0:12 seconds.
Gary, thanks for the nice and clear explanation. It indeeds works well, however you are saying you can do this with photo's as well. I tried this, but so far I can only at one photo to the movie and not multiple.
What I have made is a number of stills with a green background. I want to put those stills over a running movie whilst replacing the green with it. Is this possible with imovie or should I move to other software?
You can only do one photo at a time just as you can only do one video at a time.
Green screen can be used in lots of different creative ways, sure. But you usually do the video over the image, not the other way around.
You can do picture-in-picture with a picture over the video if the picture is semi-transparent.
Hi Gary, thanks for the very fast response.
Sorry to hear that what I want cannot be done in iMovie. I understand you normally do the other way around, but I try to make a stop motion movie with some kids and we have plenty simple still camera's but only 1 video camera, so it needs to be the other way around.
Anyway I "solved" it partly by making a movie of the stills and drag that movie onto another movie. It works, but the result is a bit rough so I probably need to experiment with that a bit more.
Hi Gary,
I'm looking to use the side-by-side feature without compromising the aspect ratio of either clip. I shot them both in widescreen, but when I put them side by side, both videos are clipped and sized as if in a portrait. Am I able to have to widescreen clips side by side, with a letterbox-type affect?
Thanks!
Probably not way to do that with iMovie. There are no options to choose from, really. But play around with it a bit to see.
Well, after messing with it for several hours, I made some progress. Looks like I am able to export the clips to Quicktime and resize them to 300 x 960, then re-import those into iMovie. Both clips then fit into a letterboxed format just as they were shot. It's a good bit of work, but I think the results look really cool.
Thanks for the video and all of the answers above. It really helped me get to this point.
Gary,
So how do I use PiP and iMovie to create an effect like you have? Small video of you narrating and bigger video of the action?
Thanks in advance!
-Chris
I don't use iMovie for that. See episode 515: http://macmost.com/screen-capture-plus-camera.html
I have created my green screen video and am trying to add a logo to it. I can't seem to get the image to drop into the video. First I established the green screen, then I dropped my video into it and now I am trying to drop the logo. Am I doing something wrong?
Are you trying to apply two effects at once? Green Screen and Picture-in-Picture? You can't do that in iMovie.
I checked the show all tools in preferences and the list with picture in picture don't show up... :(
"Advanced Tools" is the preference you need to set. And then you need to drag a clip ontop of another clip in the project (not the events).
Yes that's what I clicked still did not show up.
Which version of iMovie are you using?
the newest 9.0.4
Then I'm not sure why you aren't seeing it. Try creating a new project, put a plain ordinary video in it, and then try dragging and dropping a second video on to that one in the project (not event). Try following along with what I do in this video.
HI gary, When i drag the video over another video it only says " Insert, cancel, replace, and audio only" It doesn't say side by side and thats what i need
0:12
Gary, I am trying to create an iMovie 11 project of 62 school children, with their baby photo side-by-side next to the most recent still photo. How can I insert a transition between each side-by-side. The s-b-s feature appears to eliminate the transition. Can you help?
I wouldn't use iMovie for that. I would use Keynote.
Can you tell me how you achieve your own picture (of yourself) in your videos. It doesn't look like the iMovie picture-in-picture. It looks much better - tilted a little, and outside the frame of the video. Love to hear how it's done. Thanks.
http://macmost.com/screen-capture-plus-camera.html
I noticed someone left a comment about how to do a top-and-bottom side by side effect and I have a suggestion. I haven't tried it, but I don't see why it wouldn't work:
Rotate the two videos shot landscape 90 degrees to the right, use the side by side tool to group them together, save the video in the highest quality, then rotate the final product 90 degrees to the left. Perhaps someone could verify whether or not this works?
Good luck!
Also, thanks for the informative video, Gary!
Thanks for what You're doing and for sharing Your information in such a simple, comprehensive manner! Cheers!!!
I don't know if you can help me with this or not and it might be a stupid question, but I want to add a still photo before the video w/music that I've already created. How do I do that while keeping the video at the exact same parts in the music? Did that make sense???
Just drag and drop the photo before the first part of the video. Unless you are putting the music as a "over the whole video" soundtrack, it will move everything over. Otherwise, remove and re-add the sound as a regular "under the video" sound, not as a complete soundtrack.
Hello: I am doing a special effects video and I want to put in a picture in picture over the video, while their is a green screen in the background. It is not letting me do that. Can I?
In iMovie you can only do one at a time -- green screen OR p-in-p.
Thanks for your response. :) Unfortunately, my project is a perfectly synched music video. Is there any way to move the whole project over (as a whole), then add what I need to in front of the project?
If you move the sound first, from a soundtrack to a regular sound, then everything should still be in sync. Then add the photo to the start. Try it. Experiment. You'll get it.
I know you probably want to pull your hair out over me by now... ;-p But now if you could just tell me how to move the sound from a soundtrack to a regular sound.... I hate to sound like I don't know much about imovie (taught myself) & have learned quite a lot (the latest one from you, picture in picture) and can usually find answers or tutorials to answer questions that I have. Made this video for a benefit concert on Saturday and forgot to leave a fair amount of lead in space before it begins...... I really do appreciate your time.
Just remove it, and then add it again. When you add it again, drop it onto the very first clip in your project. Then adjust it to start at the same time as the beginning of that clip.
Thank you so much. I'm going to practice first to make sure it works for me.
Success! The only thing that changed, was that the music ended up as a soundtrack instead of as background music as I originally had it placed.
Thanks for your patience.
Is there a way to alter the sizes of the side-by-side videos? I hope I pose this question clearly.
I have two videos which were recorded in 16x9 format. When I apply the side-by-side effect the videos parts (near the edges) are cut off. They are viewable in the original video but not in the side-by-side version.
Is there any control over how the video is cropped?
No, there's no fine-tuning for this feature in iMovie. You'll need to move up to Final Cut Pro or something like it.
Hi Gary,
I'm trying to do the Side-By-Side effect, but iMovie won't even allow me to drop the first clip over the second one. My only options are to place the first clip before or after the second clip. My preferences are already set to show advanced tools, so I don't know what's missing, any ideas?
Not sure without seeing it. Try with two different clips. Experiment. Play around. Remember you can only have one effect at a time too.
Alright, thanks.
Can you do any of this in imovie 09?
Some. Picture-in-picture is in iMovie 09. But why not upgrade to iMovie 11? It is pretty cheap.
Hi Gary,
thank's for the tutorial and keep up the good work.
I have a "problem" that is discussed in several communities. That's the effect with an activated theme and the predefined border around the picture-in-picture.
For example look at: https://discussions.apple.com/thread/3823760?start=0&tstart=0
How can I remove the "theme-border" around the picture-in-picture without deactivating the theme?
Any idea?
Thanks
Thomas
--
I don't believe you can. You either need to use the theme, or not. I never use the themes myself, but I can see how they can be useful to some.
With side-by-side, I want to have text on one side and various photos slideshowing on the right. Is this possible? If so, how? Thank you.
Not really. Side-by-side is for showing two pieces of video, not for showing on the right. Sounds like what you want would be much easier to do in Keynote. See http://macmost.com/building-photo-slideshows-with-keynote.html