
Learn how to use the new Picture-In-Picture function in iMovie 09 to overlay video or a photo on top of your main video.
▶ You can also watch this video at YouTube.
▶
▶ Watch more videos about related subjects: iMovie (138 videos).
▶
▶ Watch more videos about related subjects: iMovie (138 videos).
Video Transcript
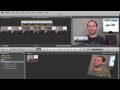
Hi this is Gary with MacMost Now. On today's episode let's take a look at using Picture In Picture in iMovie '09. So in Episode 238 we looked at how to use Cutaways in iMovie 09, now let's look at how to use Picture In Picture, which is kind of the next step. Instead of just replacing all the video, and leaving the audio track going, we're actually going to have video inside of the video, or picture inside of your video, and you can still see yourself talkig and your audio going at the same time. Let's take a look.
So the first thing you need to do is you need to go into iMovie Preferences, and you need to make sure Show Advance Tools is checked. This is what enables things like Cutaways and Picture In Picture as options. So here I am in iMovie 09, now I've got a clip down here and an empty project. I'm going to drag the clip into the project and it appears there. Now I'm going to go ahead and use a photo as an example for Picture In Picture. I'm going to drag it from the Desktop and you can see I'm going to drop it right here on the video in the project. Now I get to choose what to do with it. I'm going to choose Picture In Picture. Now it'll appear above it, this is the time in which it will appear. So at this point of the video it starts, then it ends here. I can stretch the ends to any position I want.
Now, when I go inside it here I can see over on the right that I have the Picture In Picture appearing here, as a default size in the upper right hand corner. Now I can also go over here on the right and grab one of the corners and drag it to change the size, of the Picture in Picture, and can move it anywhere I want--take any corner down so I can move it to the upper left, to the bottom, anyplace I want. The only restriction is it's gotta be the same dimensions as my video, so in this case it's wide-screen video and it fits the same dimensions as the main video. So if I stretch it to fill the whole screen, it'll fit perfectly Unfortunately you can't include a Picture In Picture that is a different shape.
So I can also go ahead and with it selected open up the Inspector and I can change some options. Like with cutaways, I can choose a Picture In Picture effect. I can choose it to dissolve, zoom in, or swap in, and I can set the duration and that will basically set the transition at the beginning and the end. So here's the dissolve for instance, and you can see here at the beginning of the video it'll fade in. I can go ahead and change that to zoom, and you can see how it works now. You also notice that there are a variety of other options including border, border color--either black, gray, or white--and even a drop shadow. All these can really help the Picture In Picture stand out in some circumstances. Course you can also use video as Picture in Picture, so basically you can have some video in the corner as you, in the mainframe, explain what's going on in the video. Or you could have you in the corner explaining what's going on in the mainframe. Or you could use them to do cheap special effects. So basically you can drag a variety of things to use into your Picture In Picture, like a photo off the desktop, or you can drag a photo from the media browser inside of iMovie, or just another video that's in the Events area of iMovie, into the project area. So that was a quick look at Picture in Picture. Hope you find it useful. Til next time this is Gary Rosenzweig with MacMost Now.


Thanks for all this tips on the new features in 09 software. I haven't updated yet but I feel I can get started as soon as I do with your podcasts!
This was very helpful. Thank you!
Thanks for the tutorial. I have been able to insert items via picture in picture, but they do not show up when I play the entire video. I can see the items there, but they only play when they are selected (as if to edit). The objects I am using are saved in the PNG format (per most instructions I've read). Am I doing something wrong?
Are you talking about when previewing the video during the editing process? The preview is imperfect, as it is rendered in real-time. What happens when you export/share? If it is OK then, then you know it is just the preview. Sometimes you can improve results by quitting and restarting iMovie. But otherwise, you have to give iMovie some slack as it can't render the video in real-time if there is too much going on.
Can't do more than one. But you can always make an image that incorporates two or more photos and then bring that in as "one." If you know how to make alpha-channelled images, you can do a lot with that.
Thanks for this. I am inserting my logo as a png file into my video but only part of the file appears in the screen when I insert picture-in-picture. I am guessing my dimensions are incorrect - I want the whole file to appear in the box - how can I ensure this happens?
Your image should have the same ratio as your video: 16:9 or 4:3. You should also look at the cropping setting for the image once it is there (Crop or Fit) -- select it and then press C to see which it is set for.
Can you insert multiple pip's? Or do you have to insert one, export, work with the exported video and insert another, etc.?
When I select 'Fit', the PNG file loses its transparency and I get a black background - is there any way round this? Thx. Laira.
I haven't experienced that myself. So it works with "crop" -- then perhaps try to use that and crop it to include everything.
I opened my PNG file in Preview and then exported it back out to a PNG with the "Alpha" box ticked and then I could drag that into iMovie and it was finally transparent.
I have iMovie ver 9.0.4 and OS X 10.7.2.
FYI, I had to bring this into iMovie as a Picture-in-Picture to overlay some existing text (long story - having to adapt an existing training video with no original project files for my company and make a single change). It's taken me a long time to get to this point...
I'm still having major problems with this actually....
Do you find that transitions work with clips once you add pic-in-pic? My dissolve transitions disappear when I add my PNG file into my clip - very strange...?
They work, but you can't overlap them. So keep the pic-in-pic away from the transitions.
it seems that you have to keep the pic-in-pic 2 seconds away from the clip transition which looks quite silly on the clip I am doing. Is there anyway of creating a transition for the pic-in-pic itself to emerge?
Hi Gary, please ignore my previous message - I see your video actually explains this.
Can you insert a video into the video clip (instead of a picture)?
Yes. You can use video. Give it a try and you'll see.
How can I add a watermark without it adding the stupid black bars to the pip watermark logo? It's so annoying...
Your PIP image needs to be the same dimensions (4:3 or 16:9) as the main video.
Wow this was so easy after watching your video, thank you!
After inserting a photo and swapping it with the video, it plays fine, except the photo zooms slightly at the beginning of the clip and gradually shrinks to the normal size as the video is playing. How can I eliminate this zoom and shrink?
Thanks
That is the default cropping, the Ken Burns effect. Select the clip and press C to change the cropping to Fit or Crop. See 341: http://macmost.com/beyond-the-ken-burns-effect.html
That was great. Thanks.
One other question - in the photo swap situation described above, my fades get eliminated. Can I still get fades between clips? Also, is there a way to get a timed pause between clips?
Just set a transition between each clip. To add a pause, I would just insert a centered title element (but with no text) in between the clips.
If I have the photo overlap the transition, it seems to eliminate the transition.
If I end the photo at the end of the video clip, I get a split second of no picture in picture, but just the video clip in full screen.
Any way to have my picture in picture in 1 clip have a transition with the next clip, which also has picture in picture?
Thanks.
Right. Sorry. Yes, if you have a p-in-p photo overlap a transition, then the transition doesn't play. So way around that. You just have to get the p-in-p as close to the end/beginning of the clip as you can. Or, not use a transition.
It appears that even if I have the p-in-p photo evenly with the beginning and end of the clip, it eliminates the transition. FYI, I came up with a workaround. If I add the photo before and after the p-in-p photo/video clip for .5 seconds with a .4 second transition between this clip and the next, it works.
Thanks for the help. I appreciate your availability to answer questions.
Gary, I found another work around for p-in-p and transitions -at least for some situations. I just copy the clip(s) I need into a separate project. I then set up the transitions as needed and export the clip as a movie. I then import that single movie clip back into the original project and add my picture-in-picture clip. Voila! All the needed transitions are retained in the self-contained movie and aren't affected by the p-in-p clip.
The inverse of Andrew's solution also works very well. Imagine you have Clip 1 to which you want to add PIP video A, then transition to Clip 2 with PIP video B (and the transition needs to include the PIP videos). You can add A to Clip 1 as a PIP and export that, and add B to Clip 2 as a PIP and export that. Then import 1A and 2B into a new project and slice and dice with however many transitions you want.
This worked PERFECTLY, thanks so much. I was so stumped before I saw this!
hi!, someone know why when i use a png file on a video as a pip sometimes the back appear black
Try changing the cropping options: Crop to Fit or the other way around.
How can I make the picture inside the clip move meanwhile the clip is being played? I'm trying to make my video like one I saw, but I can't make the picture move
You mean you want the picture-in-picture to change positions over time? That isn't something you can do in iMovie.
How can I move the smaller picture inside of the bigger picture throughout the movie?
Not sure what you mean.
i tried it and it dosent go to pip mode the picture just goes after the video and plus the picture shows up full screen after the video to
Perhaps you are leaving out a step? Maybe Advanced Tools are not turned on in the prefs?
how can i resize the photo to fit in the pip bc my logo doesnt fit
Using what software? Photoshop? Something else? I mention how to do it in Preview in a recent episode: http://macmost.com/cutting-out-objects-in-images-using-preview.html
But I would normally use something like Photoshop and its resize and crop function to produce an image the right size.
I have spent hours - no exagerration on preparing an iMovie - thought I had it all worked out. But when I look at the final version NONE of my picture in picture settings work. The audio is there, the main picture is there - but the PIP doesn't show up?! What happened?
So, by final version, you mean the exported movie file? If the pictures are missing from that, but they show up in iMovie when you preview it? Not sure what would cause that. Did you move or change the original image files between importing them and now? Try removing one P-in-P and brining it back in again and exporting.
I didn't mean the exported movie ... but now when I export it they are there! But transitions are gone? When is it best to apply the theme? I think that's what messed me up before ... I made it all and it appeared to be working and THEN I applied the theme ... did that mess things up? AND are there other themes available to download somewhere?
Yes, keep in mind that inside iMovie it is a "preview" -- a real-time preview that is useful for editing. But it is not the real thing. You have to export to see that.
You should apply a theme at the very beginning, before doing anything at all. Applying it later will wipe out a lot of "custom" work that you have done.
There are no additional themes. You can customize all you want after you apply, the themes are kinda like starting points. I don't use them at all.
Awesome ... you have been ever so helpful! I appreciate the prompt response!
I did some more evaluating and it seems that the PIP that worked in preview were the ones in which I did video over a still. The ones that didn't were still over a still ... hmmm. I am pretty sure it all works now in my exported version.
Why doesn't this work properly in iMovie '11? Every time I try to add a transparent background logo watermark via pip, it adds black bars above and below it, which is totally ridiculous. Anyone else have this problem?
Select it and press C to see the cropping options. But adjusting them you can get rid of the black bars.
I try that but can only adjust to a certain degree. I have a square logo, but can only get rectangular shape. So either I get black left and right or I don't get top and bottom of logo! What to do?
Produce a version of your logo that fits inside a 4:3 or 16:9 image. Make the rest of the image transparent.
I am doing muzzle flashes for a war movie and they have a black backround. How do i get rid of it and make them become transparent?
First, you'd need to edit them in a graphics program and take out the background so it is transparent. Then have it sized the proper ratio. But it will be hard to make it "flash" in iMovie as the p-i-p has to be there for some minimum time. I'd go with more pro-level software for making something like this.
What graphics software would you reccomend thats free? and i figured it out and it looks really good for a zero budget war film. Kuz i already had tons of WW2 gear but any way thank you
Try Seashore.
thanks for the great tutorial... I'm totally new to Mac OS and this really helps... imovie is a LOT more user friendly than Windows Movie Maker!! I have one question though....
How did you change the shape of your PIP in your tutorial videos? Did you do this in imovie or another program. I've tried everything I can think of and can only get a rectangle.
Thanks! and keep the great tips and tutorials coming!
I'm not using iMovie for that. I'm using professional broadcast software (Wirecast).
I'm having a similar issue as some stated here. I have made a transparent background (png) with a small logo in the corner. I place it on the video as a cutaway and it looks great. Well, I want the transitions, so I cut off the cutaway before the transition and then try to put it in again the same way. Well, when it plays, the video freezes at the frame where the new cutaway clip is placed (audio continues) and then it returns to playing once the cutaway is done. I thought maybe it was just a preview issue but when I export it, it's worse! NO it goes to a black screen with the logo in the corner on the second try. Any suggestions?
Hard to diagnose. I'd just keep experimenting by making small changes in the project with those clips involved.
Hey Gary! I have a png-file i want to insert as a logo to my movies. But when i insert it, it allway come out to big. Even if i try to crop it, its still to big. What am I doing wrong? I have even tried to rezize it without luck. Pleas help me ;)
JD!
You need to resize it. You can do that be selecting it in iMovie and then dragging the corners in the preview space.
Hi Gary, thanks for the tutorial. how to make a PIP effect like you have on the video (starting) 0:34. when we see you talking and the screen recodring in the background? Can this kind of PIP´s be made on iMovie? Or what program are you using?
See episode 515: http://macmost.com/screen-capture-plus-camera.html
I'm adding a transparent PNG to a youtube video that was downloaded using KeepVid, (yes these are my videos.) Im trying to put a logo in the bottom right corner but whenever i add the logo in any format (crop, Fit to Frame, Ken Burns) they all add a white background.
Is the PNG the exact same ratio as the video (16:9 or 4:3)?
When using PIP, I am adding video but I can not nudge or move the PIP to get the video to line up. Whenever I select the video, it only trims the video but does not move the start point.
Is there a way to move the PIP starting point once it is added to the original video?
Yes, just grab the whole thing. Select it all, then grab it in the middle.
I have tried everything you said. but in iMovie 11, I have saved my logo as a PNG with a transparent background, resized it appropriately as you have mentioned, but no matter what I do, the crop option still makes the background black.
There is an Allow Black/Disallow Black option on the Crop setting, but when cropping on the Disallowed Black setting, I can't fit all my logo in, no matter how big or small it is when I put it in. What can I do?
Try saving the graphic as the same screen ratio as the video (16:9 or 4:3). Make it exactly the same size when in doubt (1280x720, most likely).
That was it! My square logo came out black left and right OR with a cut off top and bottom. Now I resized it with transparent sides and it finally works. Whew!
Hi Gary, seems you are so helpful and your tutorials are great. I have an issue as many others above, but no of your answers above works. Problem: logo in png should be placed on top of video (PiP) but all I get is a black square.
PNG is made in Photoshop CS4. I have tried to save as normal png (save as…) and for web (save for web and devices). Same results.
The movie (made in iMovie 11) is Widescreen 16:9 and my png is 1280x720.
I drag and drop the png onto the movie with either Fit in Frame, Crop and even Ken Burns. I have changed the Project Properties in iMovie 11 to "Initial photo placement" to be all there options. None works.
I am on MacBook Pro OS X 10.6.8.
This should be such a basic thing to do… Any ideas??
There must be something about how you are creating the graphic. It should have a transparent background, be RGB (not CMYK) and be a 32-bit PNG with alpha channel. Try exporting from Photoshop in different ways and testing.
Thank you for this!
Dear Gary,
When I add a picture (.png without background even in a 4:3 ratio) the whole thing turns into a black square. I tried it white a picture, with several logo's .jpg / . png etc. Always the same, just one black square appears. I did the crop thing, nothing works. And then when I move around a bit, iMovie fits in a still picture of the movie into the area where the logo had to be.
I worked with Final Cut and it never was a Problem to fit in the same logo's. It has to be possible in iMovie to. Please help!
Kind Regards,
Guido.
Hi Gary or whoever can answer this. I am using iMovie 09 picture in picture. I am syncing the photos on top of video to some fast jazz music riffs. So I am resizing them to 0.2, 0.4 etc. seconds. But if I choose 0.3 or 0.5 etc. (odd numbers) and press Done they revert back to even increments. So I can't place the photos at the exact time I need them. Also without an audio waveform on a timeline as a guide I can't get the photos to change on time. Please help!!! Thank You in advance
I would upgrade to iMovie 11 so you can see the sound waveform. That might also make the time precision better, but I can't remember.
Thank you I will, perhaps this will also allow me to type in the exact tenths of seconds I need regardless of whether they're even or odd numbers. Appreciate it!
I've added a p-n-p to my project with text in the same clips. Now I add the 2nd p-n-p (no text) as close to the first but not overlapping as you suggested in above questions. On play back it's fine until it reaches the 2nd p-n-p, then the frame freezes - audio continues until the end of the frames where I inserted the 2nd p-i-p then it continues as normal. Any advice
Are you talking about in the Preview area? That's just a preview. It isn't perfect and relies on real-time rendering that can cut corners if your computer is busy with other things or doesn't have power to render multiple effects, etc. Export to see the real thing.
Thank you Gary. So what your saying - I can finish the video, which will take about 4 more pip in a 3 min. video - publish it and they will render correctly?
Is this why in a previous the audio became un-synced?
Try it. You'll see.
Keep in mind that previews are in real-time. It can't render everything in real time. If it did, preview would be the same as export and would take as long each time. So preview is a quick do-what-it-can render of the video to help you with editing.
Not sure if it is related to your audio issues.
Again thanks Gary this is a MOST useful site. Keep Smiling Rossi
Greetings!!...
If I have imovie 08' is it ok for my to get the picture in picture plug-in; if so where can i purchase it in a safe manner??
NEED HELP!... Thanks!
Picture-in-picture is not a plug-in. It is just a feature of iMovie. I can't remember if iMovie 08 has it, but iMovie 09 and 11 definitely do. Just update to 11.
Hi,
Is there a special trick of removing the soundtrack on picture within picture. I can remove the sound on each picture but if I then add a song, for instance, the original soundtrack on the picture in picture is back. In other words - If A is the original video, I add B as picture within picture and add soundtrack over everything...the B picture reverts to normal sound and no song sound! Please help if possible and many thanks in anticipation. I'm using Imovie 9
Sounds like a bug. Maybe upgrading to iMovie 11 will help?
Many thanks for swift reply and suggestion.
when i insert a picture PNG as a logo when i use fit- its too big , if i tried to crop it the box wouldnt fit the entire logo... and even though its suppose to be transparent it has a black background and it doesnt look so good as a logo with a background.
can i inset a video in the video instead of a picture could u tell me how ?
See episode 423: http://macmost.com/creating-semi-transparent-overlays-for-imovie.html for how to get it right. You can do a video, but you can't make it semi-transparent.
Hi, it's my first time using iMovie, and I have edited a few video clips that I made to make a movie. I then figured out how to insert transitions and still photos. As I added the photos ( some before the first video frame) I can no longer see the edited video clips from events library in the viewer. All I can see in the viewer are the photos which I inserted and the video clips are all grey with the yellow 'caution' symbol on the bottom left. Please help!
Hard to say what might be happening. Have you tried exporting the project to see the final video (as opposed to the preview, which is just a preview).
Any tips on synching rolling credits onto a video and music...as in a Karaoke manner.? Each new additional line totally re-adjusts the speed of rolling despite lengthening and shortening to overcome the problem The music is set...but trying to start and finish in a time sequence is proving difficult in iMovie 9. Many thanks in anticipation.
I would try something else. Rolling credits won't work well for that.
Ok...noted, thanks for reply.
Hi Gary,
A final question. If I have an event make a project and then burn as a PAL dvd, can I then change Preferences to NTSC, go in and out of iMovie, and make a dvd of the project in NTSC and burn into dvd. In essence, I want to send an original project into NTSC abroad? Many thanks once again for your help.
I just don't know. Don't know anything about PAL and whether DVDs even care about that -- I thought they didn't.
i have imovie08. yes i know i should upgrade. but, this should be easy for someone who knows -- i am totally an amateur. how can i drop a still photo into a video while keeping the soundtrack of the video going? i can only see how to drop it in and the sound stops while the pic is up...? please help me!!! thanks...
Easy to do in iMovie 11 (and 9) using cut-aways. With iMovie 08, I can't remember what is available. Maybe try detaching the audio so it is separate. Then split the video part into three sections (beginning, middle and end) so that the middle is an exact time, like 4 seconds. Then insert the photo for that exact time between beginning and end.
(Almost seems like it would be worth the upgrade price to iMovie 11 for all that effort right there).
Using iMovie 11 and placing pic (in this case a white outline circle) to highlight a player in a sport video. When image is dragged over to project, iMovie is assigning a "theme" to the image. I used "Newscast" as my theme for the project so the background on my image is the red newscast theme when it should be transparent. How do I get rid of this?
I should note that when I do the same process, but I have chosen "No Theme" for my project it works great. But I would prefer to keep the "Newscast" theme for the beginning and end of the video.
I don't think there is a way. I guess you could do everything except the picture-in-picture, export. Then create a new project, imported the export from the old one, and then add the picture-in-picture.
Gary - this is extremely helpful!
Thank you so much for sharing - I'm looking forward to reviewing your other content.
Best Regards,
Greg
Thank you so much for this incredibly clear and helpful tutorial!
I am working with a pip effect (dissolve). I want it to dissolve in, but I do not want it to dissolve out. The pip is on screen at the very end of the movie and I don't want it to fade out. Is this possible at all?
No, it is either both or neither.
When I have two videos using picture and picture, is it possible to split the "overlayed" video? Whenever I try to use the "split" on the overlayed video it will only split the original video.
No, you can't do that in iMovie.
Hello,
I'm having problems with my PNG losing its transparency when I select "fit" - I see that someone suggested opening the PNG in Preview then exporting it again as a PNG with "Alpha" selected. However I can't find the "export" function in Preview, can anyone help please?
So you are "losing" transparency? So it sounds like the file is fine, you are just not selecting the right options in iMovie. Use "Crop" instead of "Fit"
Hi Gary - it already has the white background as soon as it lands in iMovie, ie before I start playing with any tools
Ah, well then it probably isn't 32-bit to begin with. See this episode: http://macmost.com/creating-semi-transparent-overlays-for-imovie.html
I created a transparent yellow png file that I an dropping into iMovie. I am highlighting a player. In Precision Editor, It highlights correctly. But in preview nothing shows. Any idea?
Remember that Preview is literally a "preview" -- it renders in real time to give you an estimate of what you might see. But it can't show you the real file result because it has to cut corners to render in real time. Export to see.
You are correct. It worked on export not on preview. So much for WYSIWYG
If the preview window showed you exactly what you'd get, then it would have to render the video in real time. I don't think even the highest end pro video editing systems do that. It wasn't that long ago that you couldn't do any of this stuff without a multi-million dollar studio -- some perspective there.
Hi Gary:
I notice from earlier responses that it is not possible to use two PIP's at the same time in iMovie11. Is it possible with iMovie 11 to remove the background in a video of a person speaking when I put it into the PIP?
You can't remove the background (well, if you did a green screen you could -- but not in conjunction with picture-in-picture).
Since the video picture has been made (in another country) with a visible building & lawn as a background, is it then potentially possible to remove the background by using GIMP & creating an "Alpha-channel PNG file" (as described in the iMovie Missing Manual)? I do not have Photoshop but have downloaded GIMP & I am just beginning to learn using it to make layers. I'm unsure if GIMP is even a possibility with movies. However, I am hopefully you will know, but if not, are there programs available for those of us who are novice & not professionals?
GIMP is for editing images. Whether you could create a "mask" to take out a building in the background depends on many many factors: the video itself, the movement in the video, of the camera, your experience with images and video, etc.
Thank you for your quick turn around responses & help.
does it support .png format ? and what are the dimensions when adding a picture? nice video tutorial by the way :)
PNG yes. It supports any dimensions, but use images of the same ratio (16:9 or 4:3) as your video project for best results.
how do i move around the picture within the picture? Im trying to make a video but i cant seem to move the clip to sync it with the other clip.
So you want to move it in the timeline? You just click and drag it.
Dah! I am using iMovie 9. I am trying to crop photo in Project Library and have followed your vid, no probs. But I don't have an Allow Black/ Disallow Black button!!?? What's going on!? Massive thanks to you if you can tell me what my problem is. Thank you,
That only appears if the image is formatted right. Hard to help without seeing it first-hand. Maybe crop the image first, then bring it into iMovie for the easiest solution.
Gary -
Thanks for all your helpful reviews and videos. I am running into a similar problem as some of the other folks above. I am importing a .PNG file of my logo into the iMovie film I am working on. I have been able to make it transparent and apply it to a clip using Picture in Picture. In addition I took your advice and adjust the size of the PNG to a 16:9 format. The Trouble is when I convert the image to a 16:9 format it distorts the logo's proportions dramatically. Do you have a recommendation on how I can take a logo I have, adjust it to a 16:9 format, make it transparent for Picture in Picture use and not dramatically distort the Image? Thanks!
So the key is to not resize the image, but resize the canvas. So if you have a 1200x900 image, don't change its size to 1600x900. Instead, adjust the canvas size to 1600x900, leaving the image unstretched -- basically adding 200 pixels to the left and right sides. You didn't mention which image editing software you are using, but "Canvas" is the term used by many, including Photoshop.
Gary
For months I have been unable to find ANYONE (even Anchorage MAC store) who knows any way to make an imovie in which I can indicate (pointer, highlight, etc.) a feature on an image, after which I will use said imovie inside my main turorial imovie so that kids can quickly see a visual in the "indicating (arrow or some other indicating method) inset "picture in a picture" positioned auxiliary imovie. I can not believe that Apple didn't make such an obvious feature for we who make tutorial imovies for kids (and other humans). How can such an obvious need be such a herculean challenge for Apple who received $1800 from me so that I could use the Macbook Pro to make a simple children's math video. Unbelieveable!
I am so impressed with your youtube instructional videos that I thought I would try my luck in getting a reply from you.
Thank you in advance Gary!
Brent
First, there is a way to do this. Here is that tutorial:
http://macmost.com/creating-semi-transparent-overlays-for-imovie.html
Second, as a software engineer myself, I can shed some light on why you sometimes can't find the features you want in software like iMovie.
Let's say there are 1000 features of video editing software. Order them from 1 to 1000 ranked by how often they are used. So 1 is the most used, and 1000 is the least. Things like transitions, titles, background music, etc, are found near the top.
So comparing iMovie to Final Cut Pro X, iMovie has 1 to 100 and FCPX has 1 to 900. iMovie is "free with new Mac" and FCPX is $300.
So let's take as a given that your feature request of a "visual indicator" is feature 101. If Apple had just put 101 features in iMovie instead of 100, then you would have gotten you visual indicator feature. But what about 102? Instead of you asking for 101, then some other person would be here asking for 102. Or 103, 104, etc. Where does Apple draw the line? With every new feature the software gets more complex to develop, and harder to maintain. The line has to be drawn somewhere.
And then there is the factor of ease-of-use. Clearly a goal for Apple is to make iMovie easy to use. Doing that with 100 features is tough. 101 makes it tougher. Maybe one more feature wouldn't be that big of a deal, but again, you have to draw the line somewhere. There will always be someone requesting the NEXT feature on the list.
Hope that gives you some insight. I've developed hundreds of pieces of software in my life, and that "where to draw the line" problem comes up with every one of them.