
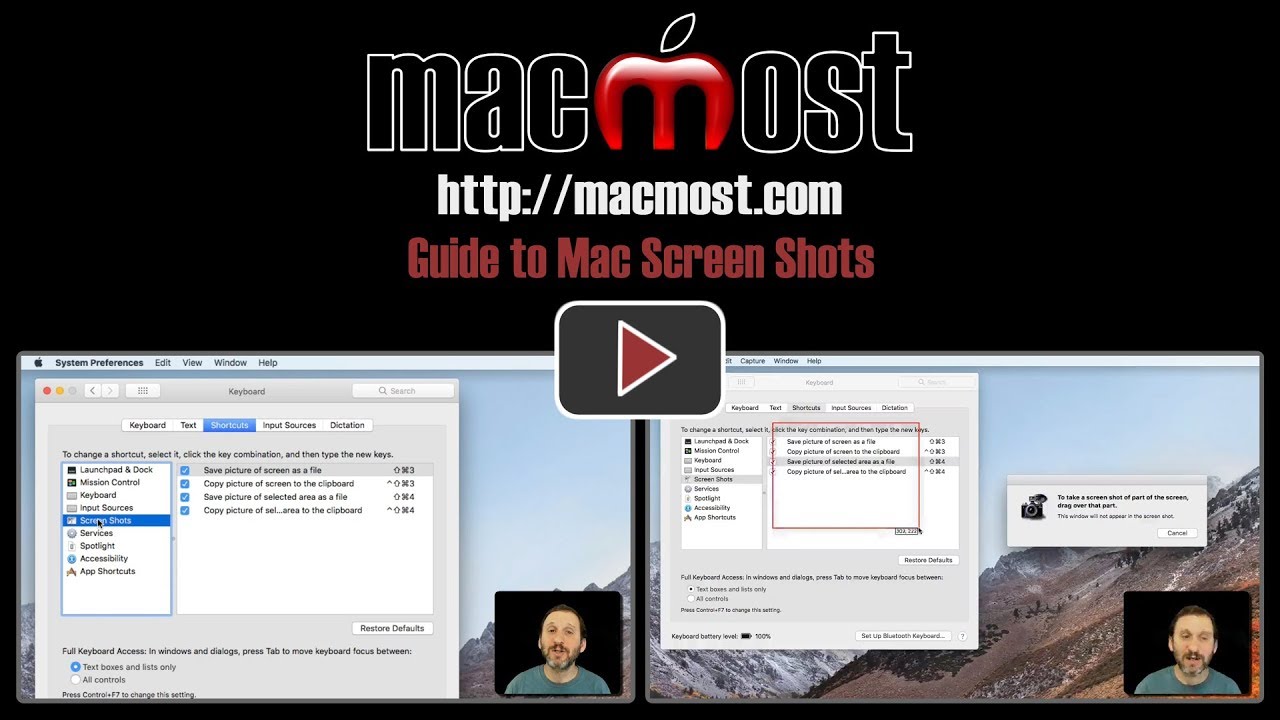
There are six variations on how to take screen shots using the built-on macOS functionality. You can save screens, areas and windows to files or the clipboard. There is also a Grab app that comes with your Mac that allows you to capture and preview your images before saving. You can also capture timed images. Preview can also be used to capture the screen and QuickTime Player can do video captures.
▶ You can also watch this video at YouTube.
▶
▶


Thanks for the guide to Mac screen shots. Just what I've been looking for! Particularly the video capture info.
One nice advantage of using Preview to take a screenshot is that you have all of Preview's annotation features immediately available—text, arrows, etc.
I have been using iMacs and MacBooks for years yet everything you showed in this video was new to me. Thanks.
Very interesting! Does any of these commands allow to you capture a window that spreads over several screens?
Jacques: Where are you seeing a window that spreads over multiple screens? Typically, this doesn't happen.
Thank you, Gary! I've also been using Mac for many, many years. I knew about Grab and Screen Shots but adding Preview screen shots and especially video will be quite useful. The latter will be great for sending to IT for debugging.
Thank you, great tips as usual - always something new to learn!