MacMost Now 130: Blurring An Area In iMovie 08

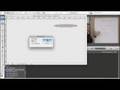
Gary Rosenzweig attempts to using iMovie 08 to blur out an area in a video. You can use this to blur a license plate, face or something else you want to remove.
You can also watch this video at YouTube.
Watch more videos about related subjects: iMovie (136 videos).

Video Transcript

Hi this is Gary with MacMost Now. Today let's do the impossible and add a video blur in iMovie 08. 
Now iMovie 08 is a bit of a disappointment to most people and I hated it when it first came out. But I've grown to love it over the months and I use it to edit every episode of MacMost Now.  And it still frustrates me that there are a few things I can't really do that I could do in previous versions of iMovie and can do in other editing programs like Final Cut. So when I'd see one of these I'd really want to figure out if there was a way to do it all.  One of these is adding a video blur. This is say, you've got a picture of a license plate or somebody's email or even somebody in your video that you want to blur out, you don't want them to be there but you don't want to have to re-shoot the entire thing. You just want to create a blurry area in your video. In more advanced editors there's functions to be able to do this and even in something like QuickTime Pro there's some tricks to be able to superimpose images on top of your video to do this as well. In iMovie 08 it seems to be very tricky, if not impossible. So I set myself a goal of having to figure out a way to do this and I did come up with a solution. It's not pretty but it does work and it doesn't require you to use any other video editors.  All it needs is iMovie 08 and some image editor, like Photo Shop, Fireworks, or anything that you've got. Let's go and take a look step by step of how to create a video blur in iMovie 08.
So here in iMovie I've got a simple movie here. There's simply one thing here in the library and it's a video of me giving a presentation. What I've done in the presentation  is I wrote my email address up at the top here and I don't want that to appear in  the video so I'm going to fade that out, blur it. So I drag it into my iMovie project here at the top. Notice that the camera is completely still, on a tripod, so that's great because this email address remains in the exact same area the entire time. So what I need to do is I need to take a copy of this and it doesn't really matter what frame of the video I take because the email address is always going to be in the same spot. But what I'm going to do is take a screen shot as large as possible so I'm going to go ahead and enlarge this iMovie window here and I'm going to do command shift three, which is my keyboard shortcut for a standard Mac screenshot and I'm going to grab the area. You don't have to be perfect, just within a pixel or two. And there you go. I've grabbed the area so now I have a picture that I can paste into a graphics program. I'm going to use Photoshop because it's very popular. You can use Fireworks or Graphic Converter or anything else that you have  because we need to create a blur effect here so I'm going to go ahead and create a new document and it will remember that I've got something on the clipboard and allow me to paste it in there. Great. So now I've got this in a Photoshop document. I'm going to go ahead and create an oval around the area I want to blur and then apply a filter. Let's do a calcium blur and okay. So now we've blurred that area out. That's great. So now what we want to do is we only want to have that area so I'm going to invert the selection. Select and inverse and then hit delete. So now we've gotten rid of everything, we've made everything else transparent except for this blurry area. I'm going to go ahead and save this is as a, we'll call it 'blur' and we'll do it as a png is a really good format for this. So blur.png. And we'll just choose the regular options and we'll save it out.  So now we've got blur.png. 
So now back in iMovie we go to our directory where we've got the original screenshot and there's the blur as well. Now if we click on the blur you can drag that right into iMovie and if you drag it after the clip it will actually create a still image for about four seconds in your movie. But if you drag it right over the video, you can actually drop it on top of the video and it will superimpose this image on top of what's there. Release.  And there we go. We actually have this image superimposed on top which this is the only part of it, the rest of it is transparent so as I scroll back and forth I can see the rest of the video plays normally and this part now has the static area there. So now, that's all good. Except for one thing. If I go to the beginning of the video you can see that the graphic fades in and the same thing at the end, it fades out meaning at the very beginning and very end you can read my email address. Now that's no good so we have to go and solve this problem. As you would expect there is a way to adjust the fade in and fade out if you right click or control click on the movie and choose Project Properties you get a bunch of properties, including the Title Fade Duration and you can set that to be longer or shorter. The only problem is you can only go to a quarter of a second and that's still too long, we need it down to zero and there's no way to actually get it down to zero. So there's only one thing for us to do, trying all other options, we've got to actually export this movie and once it's exported we've got to go in and re-import it in. This is a big pain but it's the only way to get it done. So we're going to export this as temp, as a media movie -- actually let's do it as large so we have it as full size for the movie that we're making.  And once we have this we'll be able to re-import it and trim the front and back of the video.
So now we have our new movie so we want to use file import movies in iMovie 08 and click on temp and it will bring in this copy basically of the original movie and it will go ahead and put it in our library. So go ahead and select the clip and the blur effect, there we go.  And we'll go ahead and take the second copy of it, bring it in here and now we've got the blur effect already there and we've also got of course you see we have that fade in and the fade out at the beginning and end. So we select the clip, we do Trim and we're able to go ahead and trim just a little bit off the beginning and a little  bit off the end. Done.  And now we get rid of that transition there at the beginning and end and there's no way to read the email address. Now we can go ahead and add more things to this movie, export it and we've completely, successfully blurred out the element that we wanted to blur out.
So as you can see here the solution's a bit convoluted having to export your movie halfway through and re-import it in. But it does work. So if you have the occasional need for something like this and you don't want to invest in a more advanced video editor this is a solution for you. Hopefully in a future version of iMovie we might get some more advanced functionality or at least Apple will once again let third party developers create plug ins as you could for earlier versions of iMovie.
Until next time this is Gary Rosenzweig with MacMost Now.

Comments: 31 Comments

    17 years ago

    Thanks for the tutorial. It was a big help. Couldn't agree more about Apple needing to open it for plug-ins.

    Leslie Anderson
    16 years ago

    Excellent tip... Doesn't work in iMovie 09 though. Any idea how to get around this?

      16 years ago

      It does work in iMovie 09, but things are a little different. But the basic concept is the same. You can actually use Picture-in-picture to just grab a small blurry graphic and place it where you want over the video.

    ron gantt
    16 years ago

    i tried to do this in imovie 09, well the problem isn't putting the blur in, its making the blur work PS cs4, i dont see the oval crop, and then when i try with a square crop, and i invert, you say hit delete when i do that nothing happens, and if i command x to cut it out, when i save it there is a WHITE background, and even if i open with a transparent window still the same, can you help me out???

      16 years ago

      It does take some Photoshop skills, yes. And explaining all the details of how to do this in Photoshop would take far more than a comment. Maybe find a friend that knows photoshop to help?

    HMastersen
    15 years ago

    Awesome clip Gary, you really helped me. I have enjoyed iMovie 08 but was amazed at the end when I couldn't blur a few things. Great workaround. Here is my expanded actions for what Gary does:

    On my Mac, this is how it went:
    - image is created as Gary does, then saved as .tiff file
    - image must then be saved as JPEG for use in GIMP (image editor I use, which is free!!)
    - Open JPEG in GIMP, then use oval or square to select area to blur
    - Then select Filter/Blur as Gary does
    - Then hit "control I" to invert the selection
    - Then select Edit/Clear
    - Then select Layer/Transparency/Add Alpha Channel
    - Then select Edit/Clear again
    - Then Save As a png file
    - Then do the rest as per Gary's vid

    I found absolutely nothing else on the web for blurring, Gary is the man

    PJae
    15 years ago

    Everything seems to work except for the whole dropping the inverted pic onto the clip. Our iMovie 08 only gives the option to REPLACE or INSERT the blur pic. Gary's video shows the blur being superimposed...that's not happening! Please help!

    Cory
    15 years ago

    Gary, you say it works in iMovie 09, but -- as PJae notes -- I can't put the .png file "over" the clip. Any tips?

      15 years ago

      It sounds to me like you don't have "show advanced tools" turned on in the iMovie prefs. Then, use the picture-in-picture option to do this in iMovie 09.

        Ryan
        15 years ago

        Gary, When I blur the face in photoshop like the video mentions and then drag it into imovie 09 with picture in picture I get a black ring around the image. My image is saved as a png but every way I have tried it it leaves this black ring around the edge of the image. Any ideas.

        THANKS

          15 years ago

          You've got to make sure you save it as a 32-bit png with an alpha channel. And you've got to make sure it is transparent (no background). Perhaps find a friend who is a Photoshop expert to help?

    Juangcastro
    15 years ago

    Gary, instead of the trimming procedure, you just can insert a White or Black miniclip before and after your main clip, so the blur will fade in/out during the blank clip.
    cheers.

      15 years ago

      You could, but then you would have that small blank spot in your video that you may not want.

    ...
    15 years ago

    i do everything but it wont let put the photo/picture in the movie... only before and sfter

      15 years ago

      Which version of iMovie? And have you turned on advanced tools?

    ...E
    14 years ago

    How can you do this if an object is moving? Say a license plate on a car that is driving? Your blur would stay stationary, but the object you want blurred moves.

    ...E
    14 years ago

    Looks great. Thanks for linking me there. One last question, though. How about blurring everything but the face in your tutorial vid (background). Can you do that with either iMovie or Premiere Elements?

      14 years ago

      I haven't tried that. Same technique, just different overlay graphic. But some of the tools in Premiere might make it even easier.

    E...
    14 years ago

    So would you create many shapes and have multiple title slides, with each one only lasting a second or two (to account for movement of arms and feet, possibly)? Could you make a video for this? Thanks.

      14 years ago

      That would be painful. If it can't be done with one overlay graphic, then I wouldn't do it this way. I'd move to pro editing software, or perhaps animation software.

    E...
    14 years ago

    Thanks for the advice. I have been looking at editing software for a while and comparing their abilities. Do you have a suggestion about which one to get?

      14 years ago

      You should ask in some video editing forums. My experience is limited.

    Lincoln
    14 years ago

    Hi Gary! Thanks for the video!

    I have one question. I need blur a really small area, but even if a create a 10x10 pixel PNG file, iMovie (11) import the PIP with a bigger image. Do you know if there is any "minimum image size" for PIP?

    Regards...

      14 years ago

      You want to use an image that is the same size as the video (1280x720, for instance). And only put the blurred area in one spot of that.

        Lincoln
        14 years ago

        Gary,

        Thanks for the reply. I will try that!

        Regards!

    Hoto
    14 years ago

    Gary

    This worked like a charm, thank you very much. Took no time at all.

    Hoto

    Cameron
    14 years ago

    Does this blur effect work for Photoshop Elements?

    Anonymous
    13 years ago

    Instead of going through all that trouble, couldn't you just put a 0.25 sec black slide at the beginning and end?

    Mikel Estes
    13 years ago

    Great, great stuff, but had to stop and think on an even easier way, in shorter time, to try and edit those bits at the beg/end. Here's what I would try:

    Cropping those 'unwanted bits' to probably the smallest square possible, making it a close up of yourself(Gary), maybe even hold that crop for a better moment to begin or end on in the dialogue(so choose a longer clip, it'll be fixed in a sec.).

    At the end of the cropped clip, it then goes to your wide shot again. If you want to back up or move your wide shot then just select that part, separate it(click "Split Clip"), then choose the main wide shot, click "Join" and it sucks it back into the mother ship...so to speak.
    If the crop didn't look right,THEN export and all that info you provide in the video.
    Thanks again for a great idea!
    bonus prize: During the cropped parts, run a 'title' under the person name/position for 2-4 seconds.Even neater if you make it crosse over into a bit of the wide shot.This helps in "jump shots" a little as well.

Comments are closed for this post.