(Old Post)
 The MacMost Guide to the iPhone is a collection of articles and blog posts that will help you get the most from your iPhone. With each article, we’ve included some helpful tips and things you may not have known about.
We’ll be adding to the guide to cover updates, new applications and features. You can also leave comments with each article to share your own tips and ticks with others.
Select a topic below:
Third Party Applicatons:
 Check out the MacMost iPhone Apps Directory.
Standard Applicatons:
![]() Guide to iPhone SMS Text Application
Guide to iPhone SMS Text Application
![]() Guide to the iPhone Calendar Application
Guide to the iPhone Calendar Application
![]() Guide to the iPhone Photo Albums Application
Guide to the iPhone Photo Albums Application
![]() Guide to the iPhone Camera
Guide to the iPhone Camera
![]() Guide to YouTube on the iPhone
Guide to YouTube on the iPhone
![]() Guide to the iPhone Stocks
Guide to the iPhone Stocks
![]() Guide to iPhone Maps Application
Guide to iPhone Maps Application
![]() Guide to the iPhone Weather Application
Guide to the iPhone Weather Application
![]() Guide to the iPhone Clock
Guide to the iPhone Clock
![]() Guide to the iPhone Calculator
Guide to the iPhone Calculator
![]() Guide to the iPhone Notes
Guide to the iPhone Notes
![]() Guide to the iPhone iTunes Store
Guide to the iPhone iTunes Store
![]() Guide to the iPhone Phone Application
Guide to the iPhone Phone Application
![]() Guide to the iPhone Contacts Application
Guide to the iPhone Contacts Application
![]() Guide to the iPhone Mail Application
Guide to the iPhone Mail Application
![]() Guide to the iPhone Safari
Guide to the iPhone Safari
![]() Guide to the iPhone iPod Application
Guide to the iPhone iPod Application
More Articles:
![]() Setting Up an iPhone Email Account
Setting Up an iPhone Email Account
![]() iPhone Games
iPhone Games
![]() Guide to iPhone Cases
Guide to iPhone Cases
The iPod application on the iPhone offers you dozens of ways to browse your audio and video files and play them. You can list your content by Playlist, Artist, Composer, Album, Song or Genre. There are also ways to view only Videos, Compilations and Audiobooks.
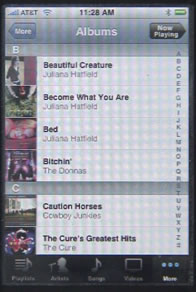
You can also turn your iPhone sideways to look at your music in Coverflow, the album-cover-clipping mode also used in iTunes and on iPods.

When the iPod is playing a song, you will get a screen with the album artwork and controls on the top and bottom.

At the bottom, you have a volume slider, a back, pause/play and forward button. Press the pause play button in the middle to pause the song.
At the top of the screen, you will see the name of the artist, song and album. You have buttons to take you back to the previous screen, or to an album song listing.
If you tap near the top of the screen you will get more controls: a repeat/loop button, a time scrub control, the current time into the track and time remaining, and a shuffle control. The time scrubber is particularly useful for moving to a section in a long podcast.
The Web browser in the iPhone is a version of Safari found on both Mac and Windows. In fact, it is almost the same browser, right down to obscure features such as a JavaScript drawing canvas and drop-shadow effects not found in other browsers.
What is missing from the iPhone version are a lot of interface elements. Instead of dozens of menu items and settings, we’ve only got a handful of buttons on the iPhone version of Safari. Plus, we lose features like multiple windows and tabs, which are replaced with something in-between.
When viewing a Web page in Safari, you get A search button (magnifying glass) at the upper left, the current URL in a field, and a refresh button (circle arrow) to the upper right. At the bottom, you have left and right arrows, a + button to add the page to your bookmarks, a bookmarks button and a page button.
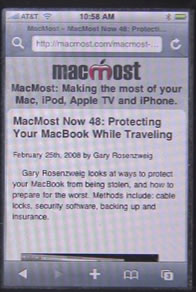
If you tap on the URL address field at the top of the screen, you can enter any URL using a keyboard. You will also get a second field for searching using Google. You can also switch to use Yahoo search in the iPhone settings for Safari.
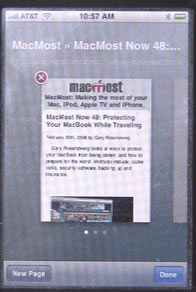
The pages button puts Safari into Pages mode, where you can flip to the left and right to view multiple windows. Use the New Button at the bottom of the page to create a new window. You can tap the red X button at the upper left of a page to remove that window.
When viewing a Web page, you can pinch and stretch the screen with two fingers to zoom in on areas. You can tap and move your finger to move around on the page. However, Web designers can set their pages to not allow this if the page is already formatted nicely for the screen. You can also turn your iPhone horizontally to get a wide-screen view.
When you tap on a data entry field, a keyboard appears to allow you to enter in data. If the field is a pop-up list of items, you will get a scrolling wheel of choices.
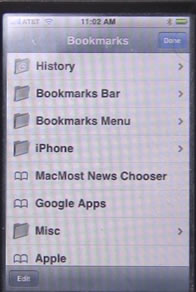
The bookmarks in Safari include a History listing that shows you recently visited Web pages. The rest should sync with the Bookmarks on you Mac’s Safari browser.
To edit bookmarks, click on the Edit button at the bottom. Then you can tap the bookmark to edit its name, location or move it to another bookmark folder.
With the Edit button depressed, you can also tap and drag items by the right right to move them up or down in the list. Tapping on the red circle on the left will allow you to delete the bookmark.
To create an iPhone email account, go to the iPhone Settings, tap the Mail item. This will take you to the main Mail preference. Under a list of current accounts, you will also see categories for Message and Sending. Probably best to set those up first.
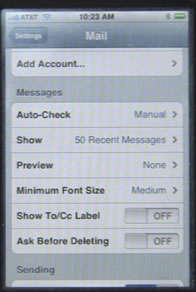
There are also some choices under the Sending category.
To create a new email account, tap the “Add Account…” item that is at the bottom of the Accounts category. You will then be given a number of choices: Y! Mail (Yahoo Mail), Gmail (Google Mail), .Mac, AOL, and Other.
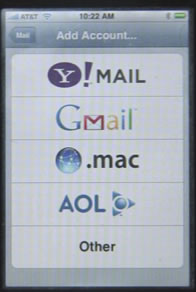
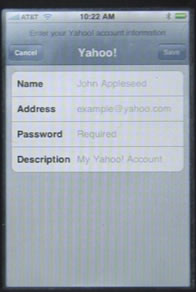
The first four allow you to quickly and easily add email accounts from four of the major Web-based email providers. When you select one of these, all you need to do is your name used in the account, your email address associated with the account, the account password, and a description to display on the iPhone to identify the account.
Selecting Other is how you would go about setting up an email account to any other email service. You get three choices: IMAP, POP, Exchange. Most email accounts would be POP (Post Office Protocol). Some more advanced new servers may offer IMAP (Internet Message Access Protocol). The difference between them is basically that POP email stores email on the server until you retrieve it. IMAP stores and manages email on the server, and you view it and take actions by accessing the server directly. So IMAP email is easier to share between two computers, like a desktop and a laptop, or a computer and a device like the iPhone. With IMAP, you can read, reply and move an email and all devices accessing the account will show these actions. With POP, all of hat takes place on your local computer, so other devices won’t even know the email existed.
When creating a POP or IMAP email account on your iPhone, you will need to enter a lot of information that should be available from your Internet service provider. However, if you already have this account set up on your Mac, you can simply go to Mail on your Mac, and look at the Preferences for that Account. Everything except your password will be visible, and you can simply copy your settings.
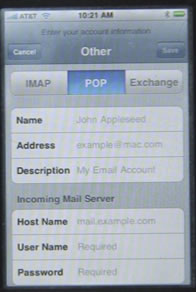
You can also access email using Exchange server. To do this, you must have IMAP access turned on on the Exchange server. Then create an account and enter the information required.
Once you have set up an account, you can edit its settings. An “Advanced” option is at the bottom of these settings and should be set up immediately.
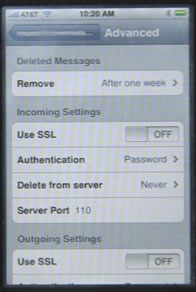
There are also some Outgoing Settings. You can set Use SSL, AUthentication and Server Port for outgoing mail as well.
The iPhone Email application lets you receive emails from standard email accounts using POP (Post Office Protocol), IMAP or Microsoft Exchange server. To set up an email account on your iPhone, see the article on setting up an iPhone email account.
Once you have an email account or two set up on your iPhone, simply tap the Mail application and you will get either the Account screen, the main screen for the last account you were viewing, or the inbox for the last account you were viewing. It depends on where you last were when using Mail.
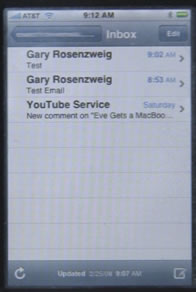
If you are viewing the inbox, you can simply tap on an email to view the email. You can also swipe left to right to bring up a delete button. Or, to delete email you can tap the Edit button at the upper right and you will get red buttons to the left of each email. Tap those to bring up a Delete button.
When you view an email, you will see the From and To fields at the top of the screen, and the message below. You will also see any additional recipients, such as people that are CC’ed. You can hide the recipients by tapping the word “Hide” at the upper right.
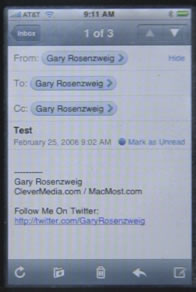
At the top of the screen are buttons that take you back to the inbox, and arrows that let you page through all of the messages in your inbox.
While looking at a message, you will also see any attachments. The iPhone can actually open and display a lot of different attachment types, such as PDF (Adobe Acrobat), Word, Excel and many image file types. It can also play many sound and video file attachment.
At the bottom of the message, you can see buttons that perform various functions. The first button, a circle/arrow, will retrieve more email from the server. The second button, a folder with a down arrow, will allow you to move the message out of the inbox to another folder. The trash can lets you delete the message. The arrow pointing left will let you Reply, Reply to all of the recipients, or Forward the message. The last button, a pencil with a box, lets you start composing a new message.
Moving the message to another folder won’t work unless the account on the server is set up with multiple folders. Most POP accounts won’t have anything except Inbox, Sent and Trash. But Web-based email like Yahoo and Gmail give you the ability to create other folders.
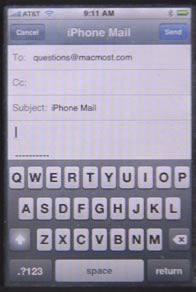
When you start composing a new message, you would usually first enter the recipients email address, or use the + button to add one from your Contacts. You can skip the Cc line unless you want to send a copy of the email to someone else as well. Then you can enter a subject.
Finally, enter a message. Your default signature is automatically included in the message.
The iPhone phone application allows you to make calls over your mobile network. In addition to containing the Contacts application, and being able to make a call from a Conact listing, you can also press the keypad button at the bottom of the screen to bring up a traditional phone keypad.
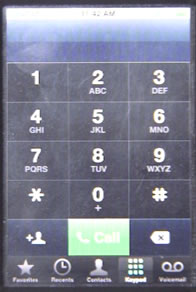
One nice thing about the iPhone phone keypad is you have a backspace button, so you don’t need to start all over again if you make a mistake in entering a number.
You can also enter a phone number in the keypad, and then press the + button at the lower left to simply create a contact for the number you’ve entered.
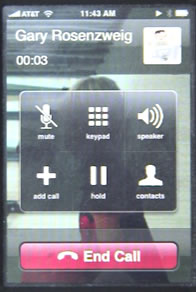
Once you place a call, you will get a set of buttons: Mute, Keypad, Speaker, Add Call, Hold and Contacts. The Hold, Mute and Speaker buttons do as you would expect. The Keypad allows you to enter in touch-tones if you are calling an automated system. Add Call allows you to call someone else and create a conference call. The Contacts button lets you view and edit contacts while talking.
The Recents button at the bottom of the Phone application allows you to see and redial phone numbers you have recently called or have called you.
The iPhone Contacts Application is hidden inside the Phone application, but it is, in fact a version of the Address Book that comes with Mac OS. To get to it, press on the Phone icon and then the Contacts button at the bottom of the screen. You will see a list of contacts that you can scroll through.
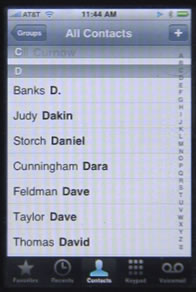
You can select a contact to edit them, or start an email to them or call them. To add a new contact, click on the + symbol to the right at the top.
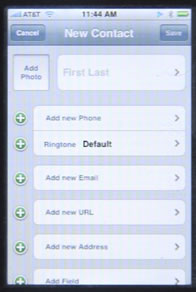
You can enter multiple phone numbers, set a specific ringtone to use when you get a call from this contact, and then add other info like email address and Web site. Click on the Add Field item at the bottom to add a Prefix, Middle Name, Suffix, Nickname, Job Title, Department, Birthday, Note or even Phonetic spellings of the contact’s name.
You can also add a photo by clicking on the Add Photo item at the upper left. Then you have the option to take a photo of the person, assuming they are standing right in front of you at the moment, or choose a photo from your Photo Albums. The photo will appear when that person calls you on your iPhone.
When viewing a contact, you can also send them a text message, and add them to your favorites. A list of favorites is an alternative to looking at your full contacts list. You can access your favorites by pressing on the Favorites button at the bottom of the Phone application.
The iPhone stocks application is a simple app that displays the current stock price of a list of stocks that you provide.
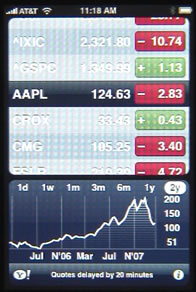
The main screen shows the stock symbol, the current price, and the relative change for the day. Red is used to indicate a falling price, green to show a rising price. The chart at the bottom of the screen shows graph of the stock price for the selected stock.
Pressing the i button at the bottom right of the screen will bring up the list of stocks you are tracking so you can edit them. You can click on the button to the left of the stock to delete it from your list. You can also click on the % or Numbers buttons on the bottom to choose to display a percentage of change, rather than actual dollars per share value.
You can re-arrange the stocks by pressing and dragging the right end of the stock line up or down.
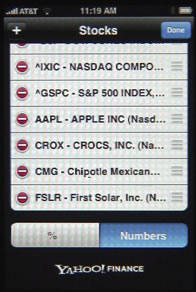
To add a stock, press on the + button at the top of the screen. You can then type the symbol of the stock or the stock name and it will look up the stock symbol for you.
The iPhone Weather application allows you to quickly view the local weather and a five-day forecast. It shows the forecasted high and low temperature, and a weather icon, such as sunny, or partly cloudy.
The iPhone camera is a 2 megapixel (1,200 x 1,600) digital camera. It has almost no features: no flash, focus or zoom. When you bring up the camera interface, it has only one button, at the bottom of the screen. Press this button and it will take a picture.

Once you have taken a picture, the camera application stores it on your phone in the Camera Roll photo album and gets ready to take another picture. You can also press the button at the bottom left corner to go to the Camera Roll. This is essentially the same as viewing the Camera Roll in the Photo Albums application.
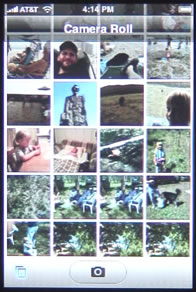
From here, you can move back and forward in the Camera Roll, start a slideshow, throw away the picture, or press the button at the bottom left. This will bring up four choices: Use As Wallpaper, Email Photo, Assign To Contact, and Send to Web Gallery.
Photo Albums is where you store pictures on your iPhone. When you first open up the Photo Albums application, you get a list of the different albums available. Camera Roll will contain the pictures you have taken on your iPhone. Photo Library will contain all of the photos you have choosen to sync with your iPhone using iTunes.
(Also see: MacMost Now 485: Creating iPhone Photo Albums, MacMost Now 432: iPhone Camera Apps, MacMost Now 416: iPhone 4 Cameras and the complete list of iPhone OS video tutorials.)

You will also see any other photo albums you have choosen to sync. To create a photo album, use iPhoto. Then, go to iTunes with your iPhone plugged in, select your iPhone and choose the Photos tab. You can select to have all of your photos and albums synced, or only a few. You can also use Smart Albums, that will have selections based on search criteria, such as the most recent photos.

When you select an album to view from the Photo Albums page, you will be taken to a Photo Library page. This will show all the photos in the album, and allow you to scroll through it. You can also press a Play button at the bottom of the screen to start a slideshow.

If you press on a photo, you will be taken to a close view of that photo. You can now use arrows at the bottom of the screen to look at the next or previous picture. You can also press the Play button to start the slideshow. If you are looking at the Camera Roll, you will also see a Trash Can button that you can use to throw away the picture.

At the bottom of the picture, in the left corner, is a small button that will bring up some more functions. You can choose to have the picture used as you iPhone wallpapge, you can email the photo, assign it to a contact, or send it to a Web Gallery that you had previous set up with your .Mac account and iPhoto.

The iPhone calendar is a mini version of iCal, the calendar application that comes with Mac OS X.
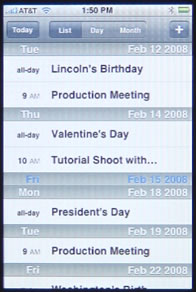
There are three main views for the calendar: List, Day and Month. The list view simply takes all the events in your calendar and displays them one after the other. It usually start by showing you today’s events, but you can scroll up or down with your finger to see earlier or later events.
The next view mode is the Day View. This shows you only events scheduled for today. You can use the arrow keys on the top left and top right corners to move from day to day. You can also scroll up and down with your finger to see events earlier or later in the day.
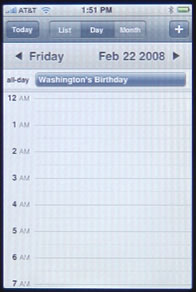
If you are viewing the current day, the screen will automatically start with the top of the screen close to the current time. Otherwise, the screen will adjust to show the first event. Any all-day events will be shown at the top of the screen, before the timeline of events.
The monthly view shows the entire month in standard calendar format. The current day will always be shown darker than the rest. Under the calendar will be a shortened list view of events for the selected day. The selected day can be the current day, or another day of the month.
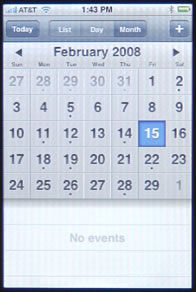
At the top of the screen, you can use the arrows to move from month to month.
Always present at the top of the screen in all three views is the Today button. This will take you back to the current day in any view. There is also the + button, which allows you to add an event.
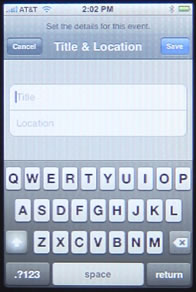
When adding an event, there are a variety of screens that you must use, starting with the main Add Event screen. From there, you can go to the Title & Location screen, the Start & End screen, the Repeat Event screen, the Event Alert screen and the Notes screen.
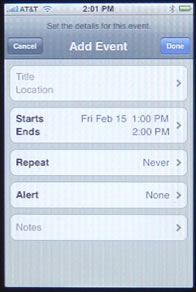
Both the Title & Location screen and the Notes screen use a keyboard to allow you to enter information.
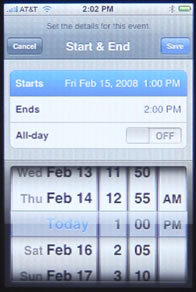
The Start & End screen uses a scrolling clock interface to allow you to choose each time. You can also turn All-day to On. If you do, the scrolling clock interface only lets you set the start and end day, not a time.
The Repeat Event screen lets you select None, Every Day, Every Week, Every 2 Weeks, Every Month or Every Year. For instance, if you select Every Day, the event will appear on every day from the current day forward.
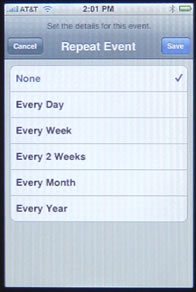
Also, if you select to have an event repeat, a new option of End Repeat is added to your main Add Event page. This allows you to choose a date on which the repeating ends.
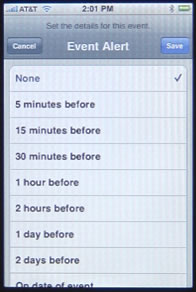
The Event Alert screen allows you to choose a variety of times to show you an alert: 5 minutes before, 15 minutes before, etc. If you choose an alert, the main Add Event screen will now allow you to also add a Second Alert.
The Notes screen allows you to add additional information about the event.
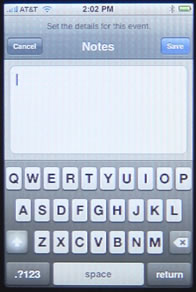
All of the screens include a Save and a Cancel button. The Save button on all screens will take you back to the main Add Event screen. So adding an event consists of a sequence of going to each of the screens and pressing Save to return to the Add Event screen. Pressing Cancel instead, will return you to the Add Event screen, but not save the information you entered.
On the Add Event screen, you can compete the event by pressing the Done button.
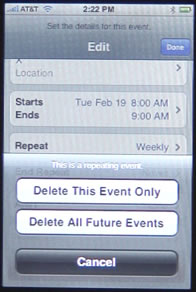
To view any event in the calendar, navigate to the event using one of the three views. Press the event to go to a screen with all the event information. Then you can press on an Edit button to go to the Edit screen, which is identical to the Add Event screen except for the red Delete Event button at the bottom of the event, instead of the Cancel button at the upper left.
The main way many people use the Calendar application is to enter their events using iCal in Mac OS, and then sync with their iPhone using iTunes. The sync works both ways, taking changes made on the iPhone and uploading them to the Mac.
We’ve created a special section called the MacMost iPhone case finder. There you can search for iPhone and iPod touch cases based on color, style, brand and model.
The iPhone’s Clock application has a lot going on that you might not expect. There are actually four different functions built in: World Clock, Alarm, Stopwatch and Timer.
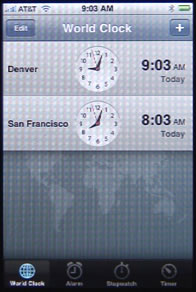
The World Clock allows you to add several different locations using a search, and it will show them all in a vertical list. Use the + button to search for and add a location. Use the Edit button to delete locations and change their order.
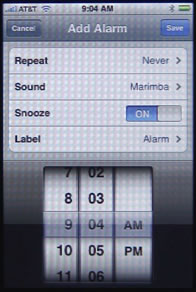
The Alarm allows you to add one or more alarm times to a list. You can specify the sound to play, whether to allow a snooze function, and you can name the alarm. You can also have the alarm repeat on one or more days of the week. You set the time for an alarm using three dials at the bottom of the screen. So, for instance, you could set the alarm to wake you Monday through Thursday at 7 a.m., and then Friday at 7:30 a.m. and Saturday at 10 a.m. You could also set an alarm for every day at 10 p.m. to remind you to take medication or let the cat out.
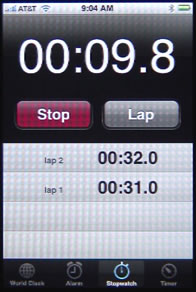
The Stopwatch is the simplest feature of the clock. It simply has a Start and Reset button. When you press the Start button, it changes to a Stop button. Meanwhile, the time changes and displays in tenths of a second. The Reset button changes to a Lap button. Press the Lap button and the time is recorded in the list and the stopwatch resets to 0 and continues counting.
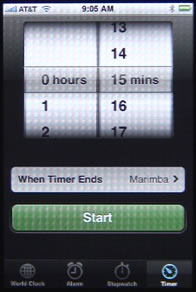
The Timer function shows a dial at the top of the screen that allows you to set a time in hours and minutes. Then you can press the Start button to start counting down. You can also specify a sound to play when time is up.
The iPhone calculator is a simple calculator with minimal functions.
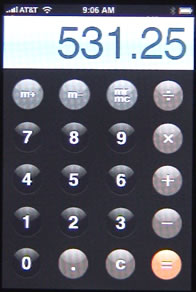
To do a simple calculation, enter in a number, then an operation, then another number, and then the = button. For instance, to add 13+86 you would enter 1 then 3, then +, then 8 and 6, then =.
There is also a memory function. Press m+ to store the current number in memory. Once it is there, you can use m+ to add to that number. Use m- to subtract from memory. When you want to get the result that is in memory, use mr/mc. Press it again to clear memory. When a number is stored in memory, the mr/mc button is outlined.
The c button will clear the current operation.
The iPhone Notes application lets you type, store and email small text documents.
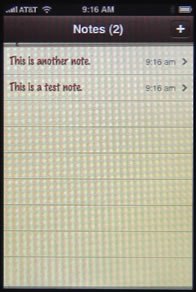
The main screen will list the notes you have stored, and the last time you edited them. Press on a note to edit it. Press the + button to create a new note.
When viewing a note, you have a few buttons at the bottom of the screen. You can use the arrows to move from note to note. You can use the letter-shaped button to email your note. You can use the trash can to delete the note.
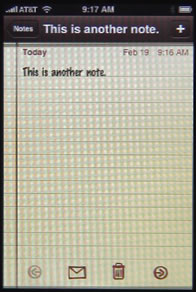
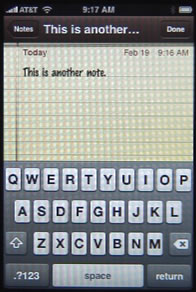
Click on the body of the note to enter edit mode. This will bring up the keyboard. You can type on the keyboard to enter text. You can roll your finger over the text in the note to reposition the cursor. To enter non-letter characters, press the the .?123 button at the bottom left. You can press, hold, roll and release to enter a single special character, or tap on the .?123 button once, and then tap on a key to type multiple characters.
The SMS Text Application lets you send text messages to other phones and connected devices that support SMS.
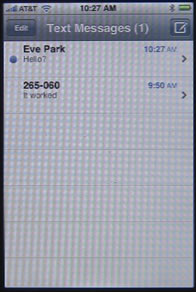
The main SMS Text screen shows your recent conversations. You can use the Edit button to delete conversations. You can also swipe left to right across the listing with your finger and press the Delete button that appears.
To start a new conversation, press the pencil-in-box button at the upper right.
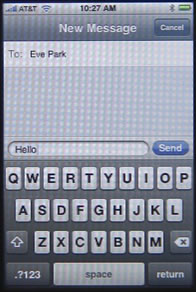
Enter a phone number, or use the + button to select one from your address book. Then click on the small text area next to the Send button to enter your message. Press the Send button to send.
Once a conversation has started, or if you select an old conversation, you will see a list of messages along with some buttons. You can press the Call button at any time to call the person you are conversing with. You can press the Contact Info button to see their listing in your Address Book.
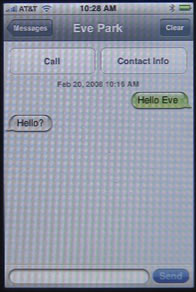
The rest of the screen shows your conversation, with your messages to the right, and the other person’s messages to the left. You can send a new message using the text area and the Send button at the bottom of the screen. You can also use the Clear button to clear out the old messages.
The iPhone You Tube Application lets you browse and view videos at the popular video sharing site YouTube.com. You can do this several ways: by using the Featured and Most Viewed lists, searching or viewing your video bookmarks or history. You can select from these options at the bottom of the screen. Press More to see other options, such as the Most Recently uploaded video, Top Rated videos. and your viewing history.
The iPhone Maps Application is allows you to view and search Google Maps. It also lets you see traffic reports in some cities, satellite views, and will give you directions from one location to another.
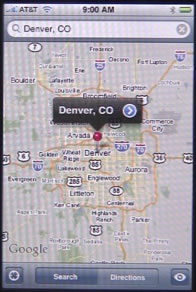
The main screen for Maps has a search field at the top and a few buttons at the bottom. Press the search field to bring up the keyboard. Then enter a location. You can enter a specific address, a zip code, the name of a city and state, or any search term to allow Google Maps to take its best guess.
Moving around the maps is done by pressing and dragging on your screen. You can zoom in by pinching the screen, and zoom out with the opposite gesture.
To get directions, press the Directions button at the bottom of the screen. You will now have two search fields at the top. Enter something in each field. You can use the squiggly button at the left to swap the fields.
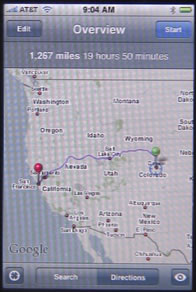
You can then press the Edit button to change the start or end locations, or use the Start button to see the first step in following the directions. Arrows will then replace the Start button and allow you to go through the directions step-by-step.
The iPhone can also find your current location with varying degrees of accuracy. Press the bulls-eye button at the lower left.
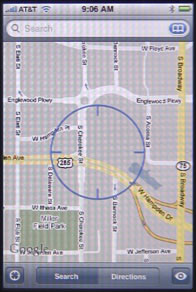
You can enable more Maps features by pressing the eye button at the bottom right. This brings up more options, such at the ability to drop a pin in the map at the current location, and to turn on traffic reports. You can also switch from map view to Satellite image view, or use a hybrid of map and imagery. The List view can be used when you are getting directions and simply wish to see a list of all the of the steps on one screen.
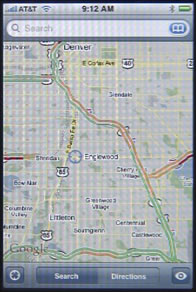
The traffic reports show up as green, red and yellow lines, usually on interstate highways in major cities. You may have to zoom out quite a distance to see them.
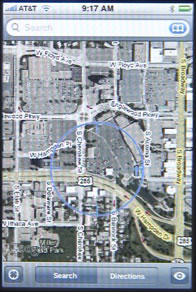
The Satellite and Hybrid views will show satellite pictures of the area. Different areas may have different quality and levels of depth.
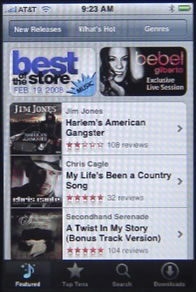
The iTunes application on the iPhone is a small version of the iTunes store found in the Mac and Windows iTunes application. You can see the featured and new releases, top ten lists, browse by genre and search. You can then purchase music and get it directly on your iPhone.
The search functionality allows you to search for group, album or song name.
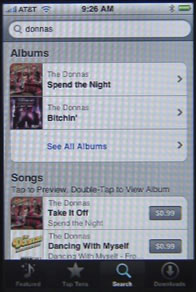
When you select an album, you can purchase the entire thing, or a single song. You can also preview a song by clicking on its listing. It plays a 30-second clip.
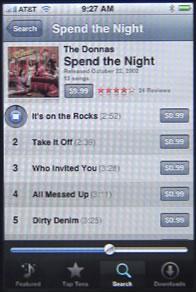
Click on the Downloads button at the bottom of the screen to see any songs you have purchased. These will automatically be added to your iPod Application as well, so after purchasing there is no need to use the iTunes Application to play the songs.


